

If you’ve own a smartphone long enough one thing will inevitably happen: your phone’s ports will begin to get clogged with lint and dirt and god knows what. Most of the time this will go unnoticed until it begins to cause significant problems. Case in point: one time I woke to discover my iPhone 6 hadn’t charged over night despite the fact that I plugged it into its Lightning cable on my nightstand. That’s when I noticed the Lightning cable wasn't plugging in a far as it used to, and even when I could plug it in all the way the slightest movement of my iPhone–such as when I’d reach for it to check the time before turning out the lights–would cause the Lightning cable to come a bit loose, leading to the not-charging problem.
This lead to several frustrating days where I could never be sure if my iPhone would charge overnight. Finally I went to the Apple store assuming the port had been damaged. That’s when the Apple
 genius shone a flashlight into the Lightning port and illuminated just how much dust and lint was building up in it, blocking the connector heads of the Lightning cable from connecting with the contacts in the port itself.
Also Check: 19 Tips And Tricks To speed up android and make it faster
This, of course, isn’t a problem limited to iPhones. It happens on Android
 phones and their microUSB ports all the time too. Dust and lint just love to collect deep in our smartphones
 ’ ports. Thankfully, there are some easy at-home solutions you can use to clean your smartphone’s ports. Here’s how to do it.
A word of warning – proceed at your own risk
A quick word of warning first: if you clean your ports too aggressively you can damage the port itself, which could result in a non-functioning phone. The advice outlined in this article is for your informational purposes only and you accept all risk. If you’re too aggressive in your cleaning you can damage the delicate connections inside the Lightning and microUSB ports. Accept that? Good. Then here are they ways to clean your various ports.
How to clean the Lightning port on your iPhone and iPad
This first bit of advice actually came from the Apple Genius that showed me what was really wrong with my Lightning port. The first step is to inspect the port with a flashlight. If you look closely you’ll be able to see if there’s any buildup of lint or debris in the port. If you can see debris the next step you want to take is to find a thin poker you can stick in the port to scoop it out.
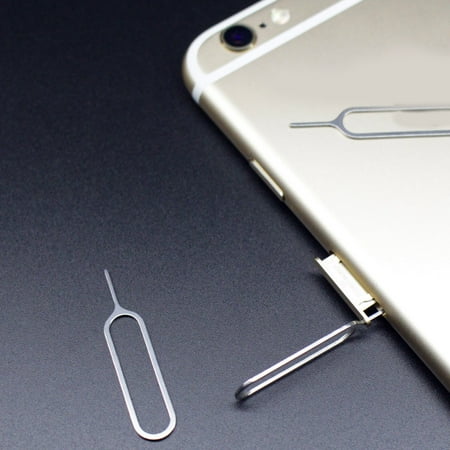
How to clean the microUSB port on your Android
You can follow the SIM eject method for Lightning ports above to clean your Android’s microUSB ports as well, but I don’t recommend that as your first option. Why? Because the internals of a microUSB port has more delicate connectors that can easily bend or snap off under too much pressure. So it’s best to try the most non-invasive approach first.
My favorite non-invasive approach is the trusty can of compressed air. You can pick up a can of compressed air at any hardware store. Now before you go all gung-ho and shoot 40 PSI’s of pressure into your micro USB port, make sure you give the can of compressed air a quick release–blow some out into the space around you. This will knock off any condensation that has built up in the nozzle. Condensations, of course, is water–and you don’t want that anywhere near your microUSB ports.

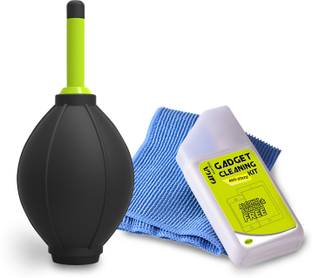
Next, start with short bursts of compressed air into the port. These should be 1-2 second bursts. Do them at an angle so the lint has room to move around and fall out. After 5-6 bursts all the lint should be free. Shine a flashlight in to make sure and plug in your microUSB cable to test to see if you’ve got a firm connection again.

If the compressed air doesn’t get all the lint out, the try the SIM eject tool or toothpick trick above. That will do it for sure–just remember, be very very gentle poking around a microUSB port so you don’t damage the fragile connectors inside.
إرسال تعليق